Tuesday, January 28, 2014

Dimensioning


Do your dimensioning in Layout space (so you don't have to reformat all your text sizes later)

Create a Layout:
Right click on "Model" select "New Layout"

Click on a layout tab, turn your grid off, rename your layer.


Dashed line in your layout = printable area
Solid line = viewport.
Right click - choose pan, move object around, or choose the icons:
Zoom Extents - enlarges object to fill viewport.


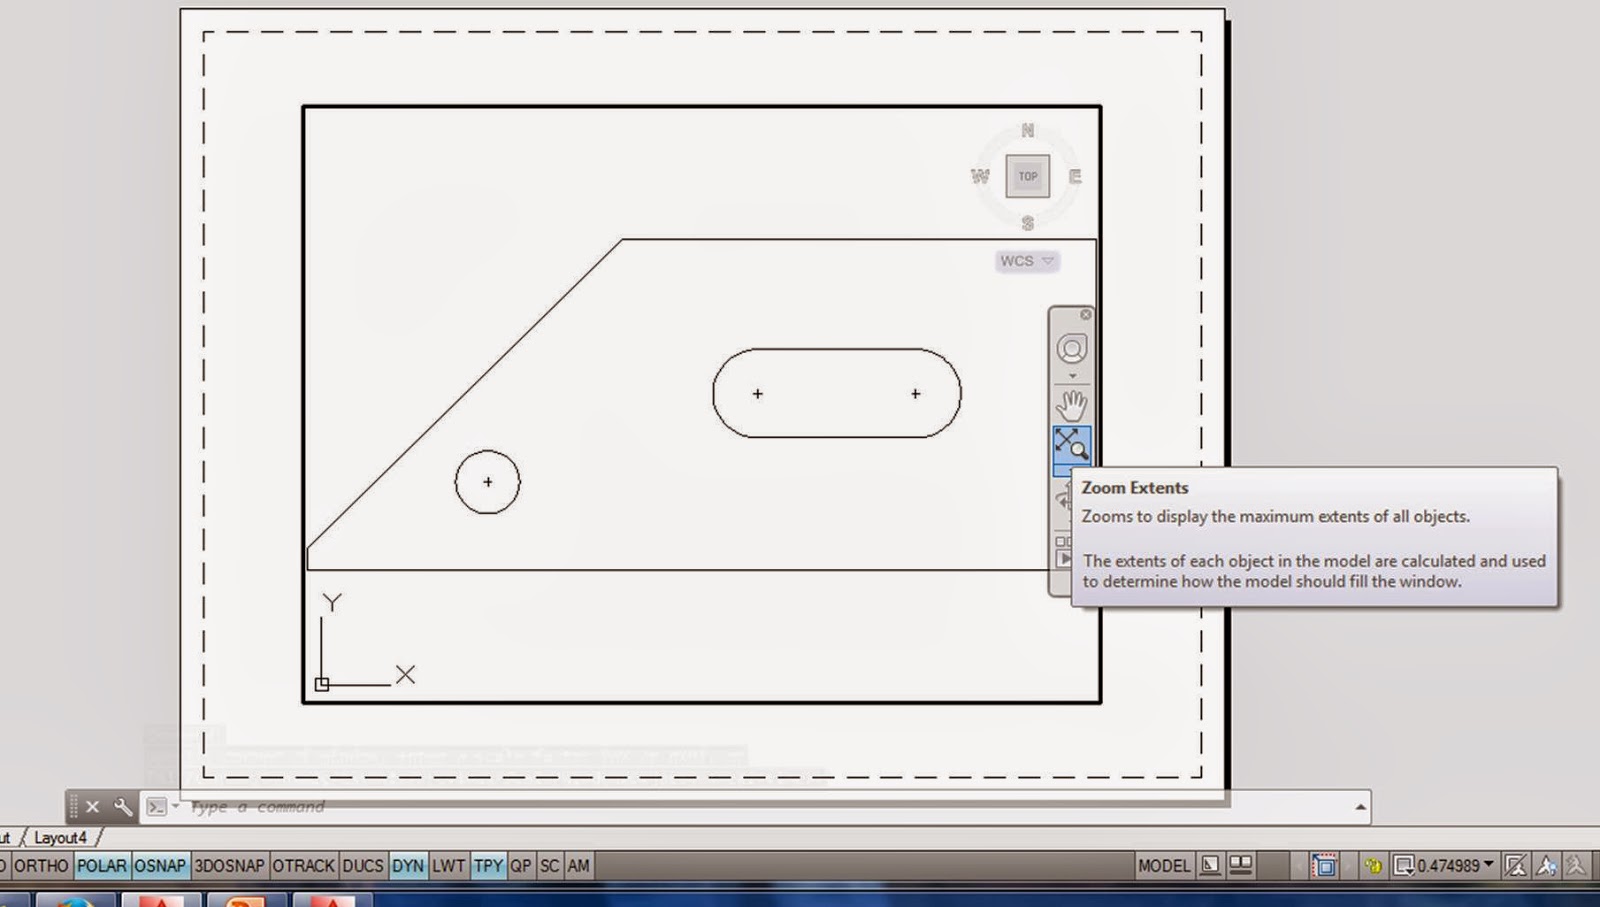
In "Paper" mode you can move your paper around, re-size the viewport area.  Just click on the line, grab a blue square,  move, and resize it.


In model space you can set your scale (1:2, 1:1 etc.) so your object is shown at a nice size on your sheet:


Set your scale factor, get everything centered, leave enough room to add dimensions.


 Create a new layer for dimensioning.  


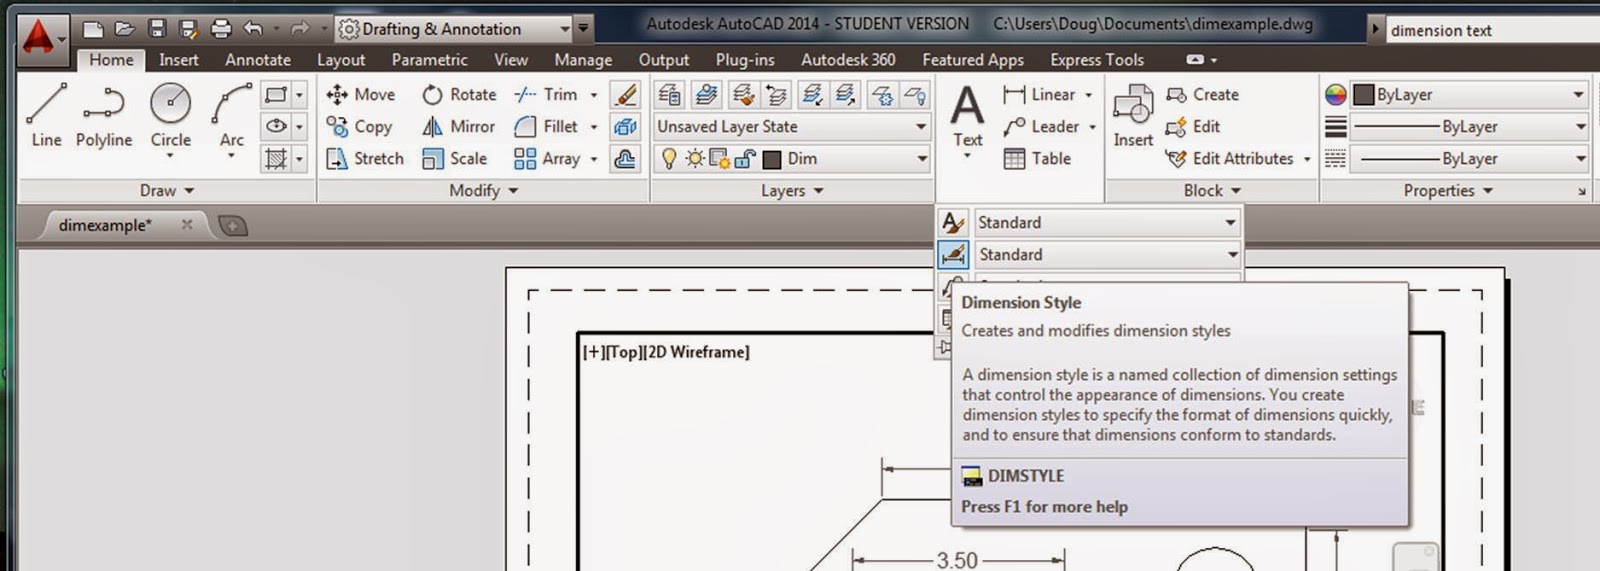
Set your dim styles: from the "Annotations" pull down menu, click on the paintbrush, or type "DIMSTYLE" into the command line
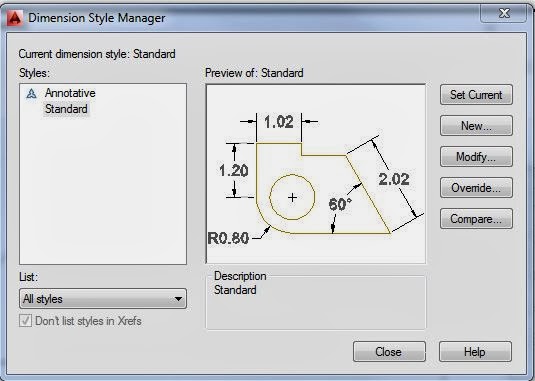

Click "modify"


Set your precision to 0.00


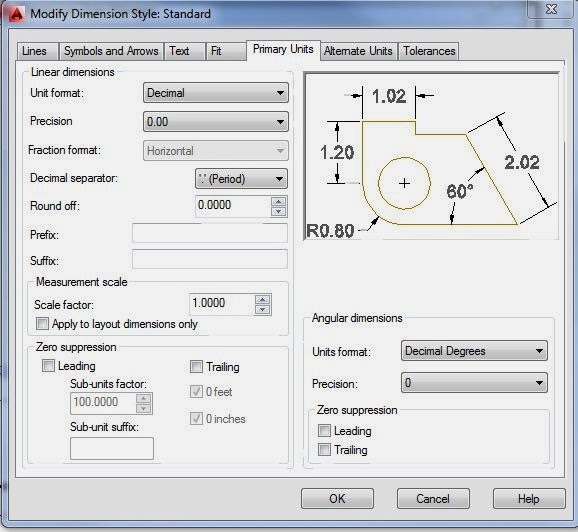
Set your text height, and select and "Aligned with dimension line"
* note: You might have to play around with your text height a little to get it to match your scaling factor.


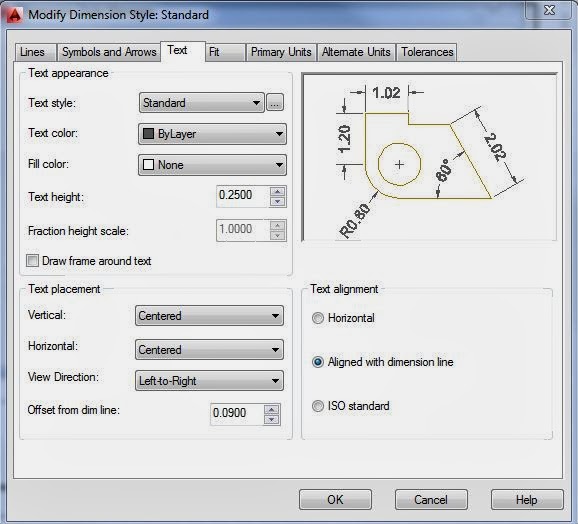
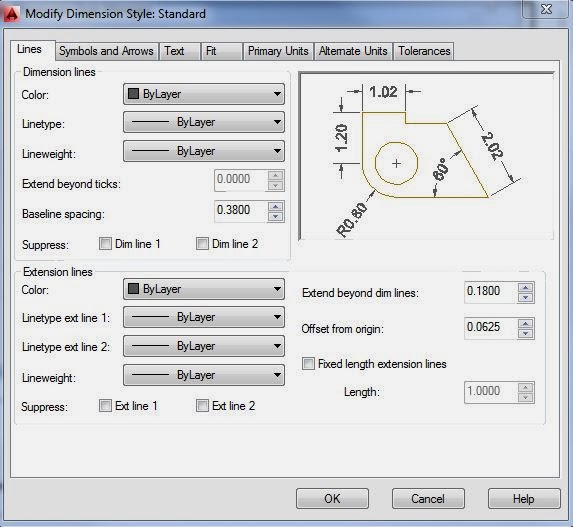
Set all your line types to "By Layer"


Choose "Set Current" to apply settings to dims.

Work on a layer in model space (click "model" in the lower right hand corner of your screen)
If paperspace is selected instead of model space, your dims will not be attached to your object - ie - they will not resize, move, or show up in your model space)

DIMLINEAR
- for horizontal and vertical measurements.


Use options in [the square brackets] to rotate text etc.. (you should have set this up already in your dim styles, but if you need to change something...)  Just watch your command line every step of the way!!


You can also select dimension, right click on the dimension, select properties, then modify precision, text size, etc.
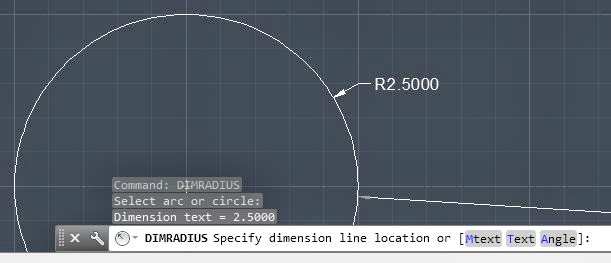


DIMRADIUS,
DIMDIAMETER
: Measures the radius or diameter of a selected circle or arc and displays the dimension text with a radius or diameter symbol in front of it. You can use grips to reposition the resulting dimension.
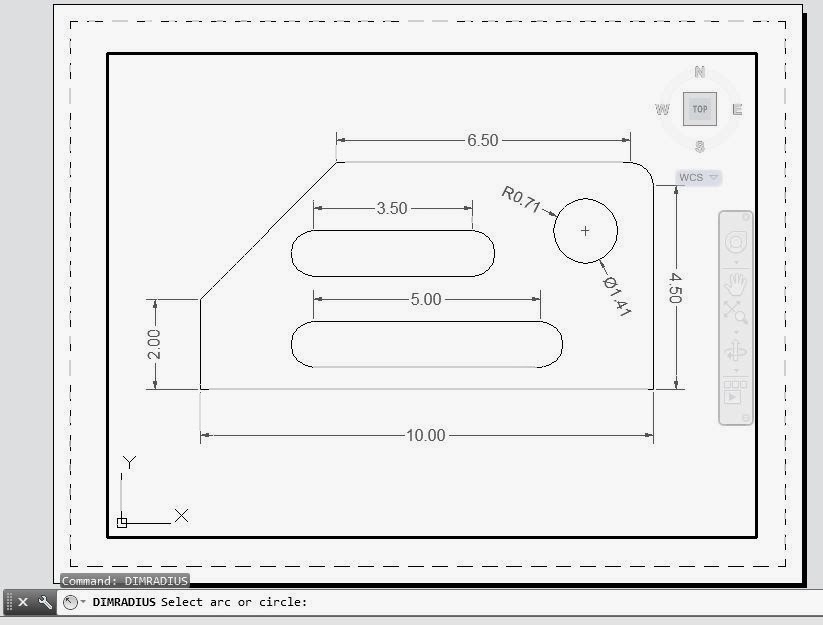
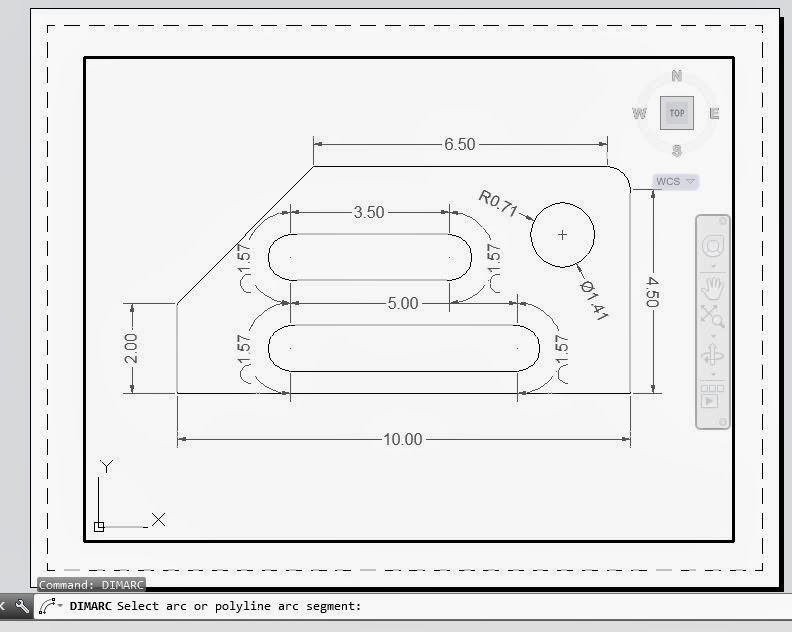


DIMARC: Arc length dimensions measure the distance along an arc or polyline arc segment. The extension lines of an arc length dimension can be orthogonal or radial. An arc symbol is displayed either above or preceding the dimension text.


DIMALIGNED: for slanting lines (4.24)


DIMANGULAR: Measures the angle between selected geometric objects
.


DIMCENTER:
Creates the center mark of circles and arcs.


DIMORDINATE
:   (X,Y)  (15, 12.5)

UCS - User Coordinate System.  Define where (0,0) is on your object, then use DIMORDINATE to measure points from your UCS


DIMBASELINE:
First, select dimlinear, dimangular, etc.as your baseline, then add additional dimensions.


DIMCONTINUE
Automatically continues creating additional dimensions from the last linear, angular, or ordinate dimension created, or from a selected extension line. The dimension lines are lined up automatically.


DIMSPACE:

Adjusts the spacing between linear dimensions or angular dimensions.


DIMSPACE:
before:

after:


EXTEND: draw a construction line, use it to line up all the dims.

from:


to:


DIMBREAK:

Breaks or restores dimension and extension lines where they cross other objects.


Monday, January 27, 2014

Common CAD Commands:


Class Lab - Create a 2D Scribble Page
I'll come around to check you off, just demonstrate that you can use the basic 2D drawing tools outlined below. 

You can use tools out of the ribbon, or type commands into the command line. 
Some Common CAD Commands:
Remember for all of these CAD commands, WATCH THE COMMAND LINE.  The command line (at the bottom of the screen, where you type commands in) will give you instructions for what information CAD needs to complete the command. [Options are in square brackets], <default – what it will do if you just hit enter without typing anything in>. 

What and How:
First tell CAD "what" you want to do, then tell it "How" you want to do it.

Drawing Commands:
LINE – draws straight lines, keeps drawing lines until you hit “ESC”.  Select line position by clicking on the screen, or entering (x,y) coordinates in the command line. Set linetype by layer.


LTSCALE: Set linetype scale to the drawing scale factor, or half the drawing scale factor.
LTSCALE example:
change scale factor from .5 to 6, changing the spacing between the dashes.


PSLTSCALE: Makes line type spacing look the same in paper space viewports, regardless of the viewport scale.


  0 =  No special linetype scaling,  1 = Viewport scaling governs linetype scaling

CELTSCALE: Changes the effective line type scale factor for new objects. 
Sets the linetype scaling for new objects relative to the LTSCALE command setting. A line created with CELTSCALE = 2 in a drawing with LTSCALE set to 0.5 would appear the same as a line created with CELTSCALE = 1 in a drawing with LTSCALE = 1.
MSLTSCALE: Visually displays dash-dot linetypes in the model tab based on the annotative scale setting.   0 = Linetypes displayed on the Model tab are not scaled by the annotation scale,
  1 = Linetypes displayed on the Model tab are scaled by the annotation scale

XLINE – Line that extends to infinity in both directions.  In ortho mode, make horizontal or vertical xlines for construction.

Ray: Draws a line that starts at a point, and extends to infinity in one direction.


PLINE – Polyline, connected line segments that can either be straight (line) or curved (arc), etc.  To switch between line types, just watch the command line, and type in a different line type instead of selecting the next point. 
ARC – curved lines

CIRCLE – draws a circle with either defined r, d, or through 2 or 3 points.  Watch command line for [different options on how] to make a circle.
RECTANGLE – draws a rectangle
POLYGON – define how many sides you want it to have.

SPLINE

Modify Commands:

Click on object – grab the blue grips to move & stretch, or type the commands into the command line.  Watch the command line for instructions on what it wants you to do.  You will need to define a base point (reference point that the modify command centers around) for many of these.


MOVE – Moves object, watch the command line for instructions.


ROTATE – select object (enter), type "ROTATE" into command line, select base point (what you want to rotate around), enter, then enter the angle you want to tilt it at, or drag it by hand to tilt it.


EXPLODE – breaks up an object into multiple unattached lines, or a polyline into individual lines and curves.  Explode is helpful if you need to erase one line, or change just part of a shape.


JOIN – connects individual lines into one shape


MIRROR – creates a mirror image of an object


FILLET – creates a rounded corner

FILLET with r = 0.0 can be used to clean up corners:


Shift-select second line, grabbing the part of the line you do not want cut away.  Now you have a nice corner instead of two intersecting lines!


CHAMFER – chops off a corner with a straight edge

STRETCH, EXTEND, LENGTHEN – elongates an object


EXTEND:
1st - pick boundary edge (what you want to extend to)
2nd - choose object to extend (or f for fence - choose multiple objects to extend


EXTEND to the other side:


TRIM – Cuts off a line at an intersection with another line. 
TRIM (enter)
 - select curved line, enter
- F (fence) enter
- draw a line through the edges you want to remove (horizontal lines on the right of the curved lines), enter


BREAK – take a chunk out of a line


ERASE – erase an object or line

UNDO – undoes your last action

ARRAY – makes multiple copies of an object
Rectangular Array:


POLAR ARRAY: copies a single object into rows around a central point.


SCALE – makes an object larger or smaller by a defined amount.  First select your object(s), then define your base point (what everything is going to shrink or expand around), then enter a scaling number (0.5 makes it half the size it was, 2 makes it twice as big)

OFFSET – creates a second set of parallel lines around an object – useful for making walls etc.


Text:
TEXT – single line text, the words you type in will not be attached to one another, and can be moved independently.

MTEXT – multiline text, everything you type in will be grouped together, so you can change the size, move it to a new location, etc. together.

Select text, then right click on it, select “properties” to change the size etc.


Dimensioning:
Select dimension, then right click, go to properties to increase text size, etc.
DIMLINEAR – show how long a line is
DIMRADIUS – label the radius of an arc or circle