
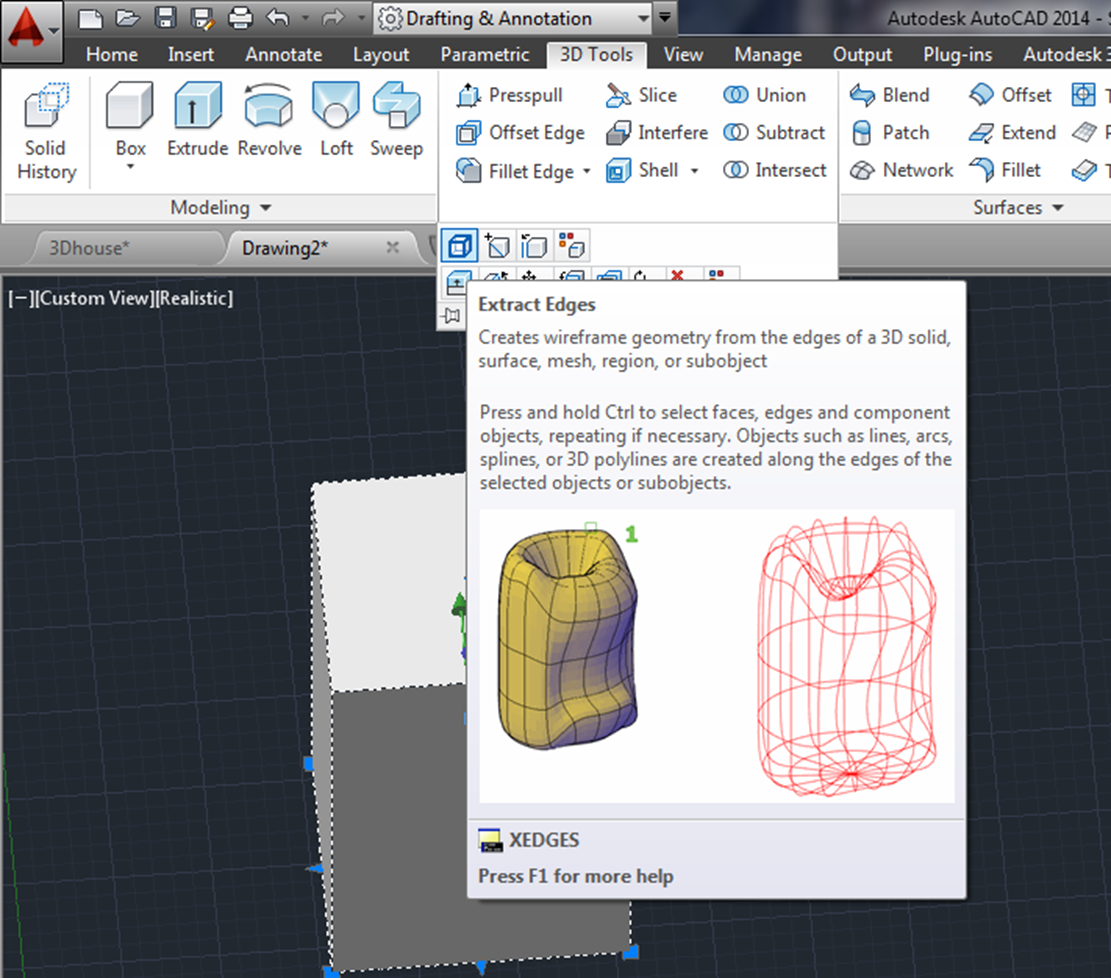
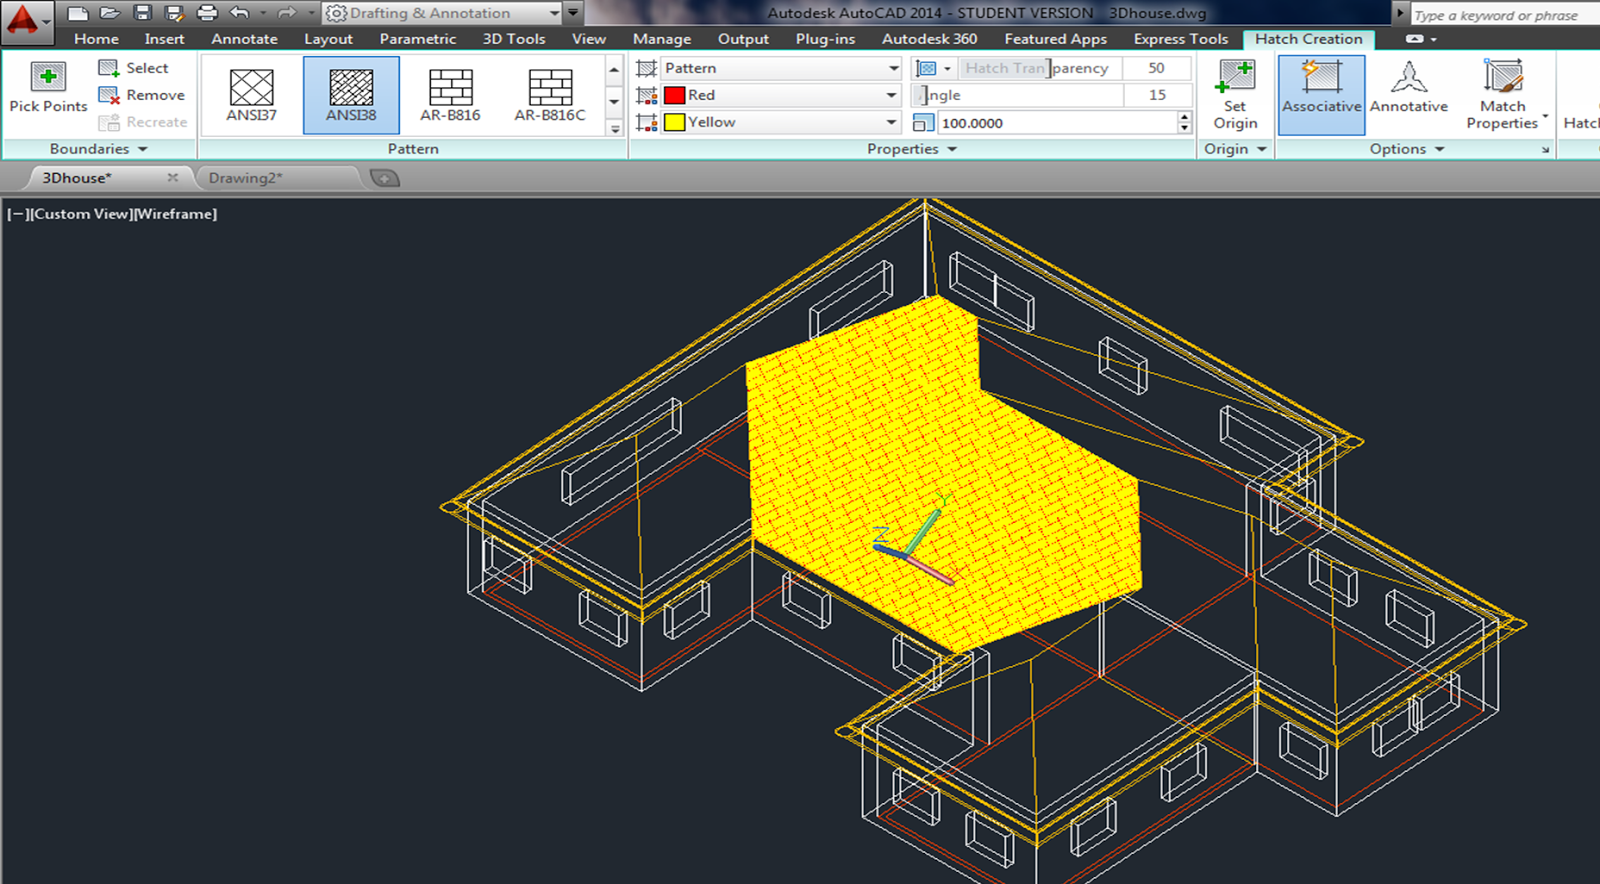
3D Hatch:
Extract the Edges of your 3D solid:
XEDGES
Now, use the hatch command. Notice that you can only hatch in the XY plane.
You need to change your coordinate system to hatch all of the sides - just rotate the coordinate system onto the face that you want to hatch, either with the view menu,
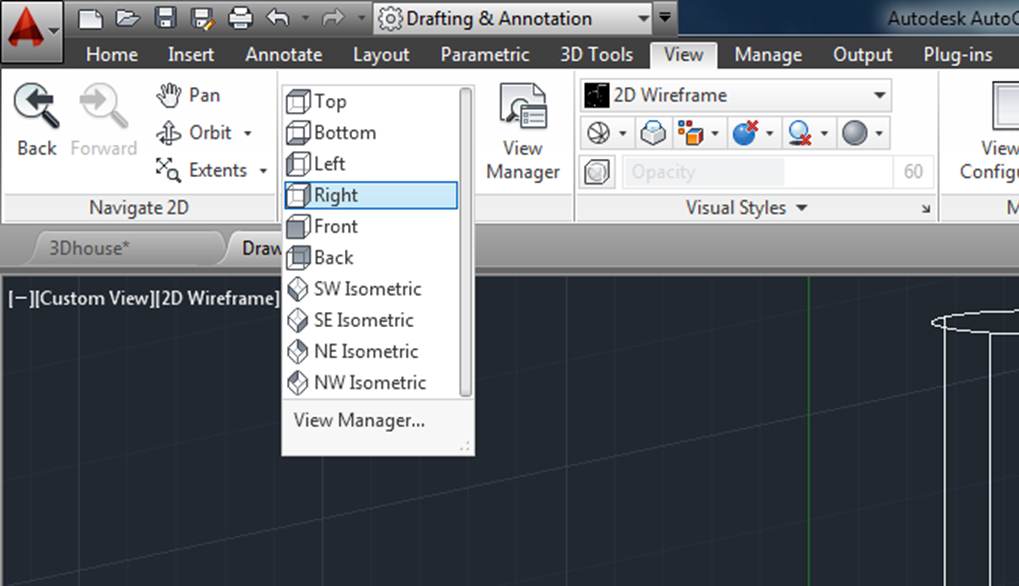
or move the coordinate system by typing in UCS and choose "face", and click on the face you want the xy plane on. (Note, it might be easier to do this from a "conceptual" rather than "wireframe" view)
Note: You can always return to the original UCS by typing in UCS - and then World.
Select hatch, and use "Match properties" so you don't have to re-define your hatch pattern for each wall etc.
Animation:
Camera moving around your object.
1. Create a 3D model

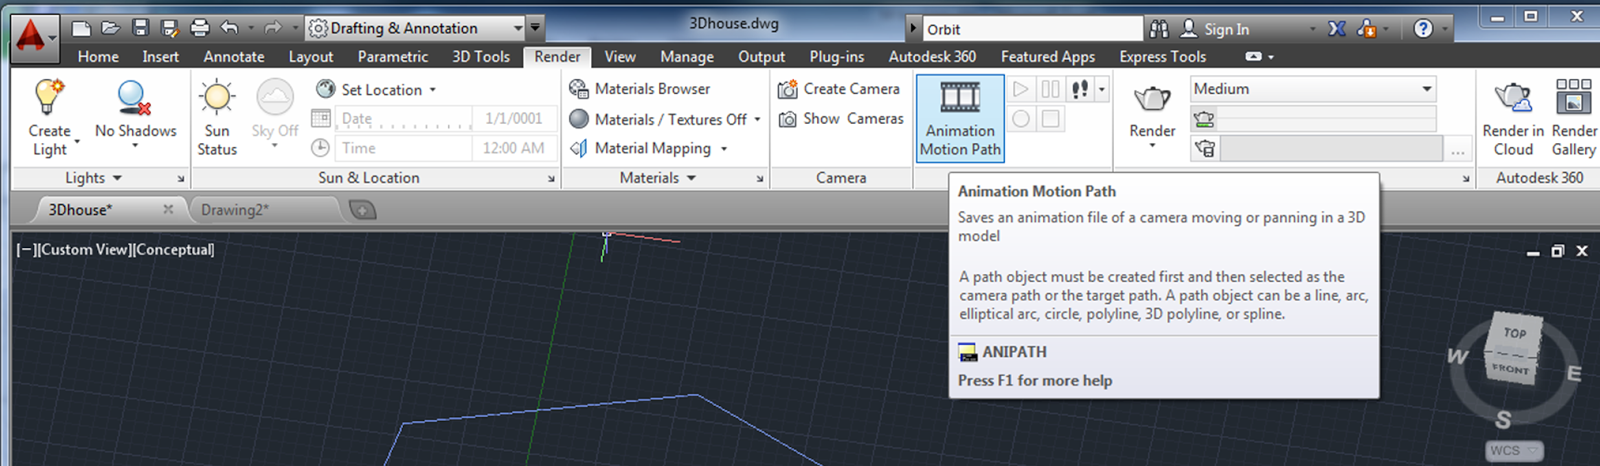
Link Camera - where the camera is
Link target - where the camera is looking
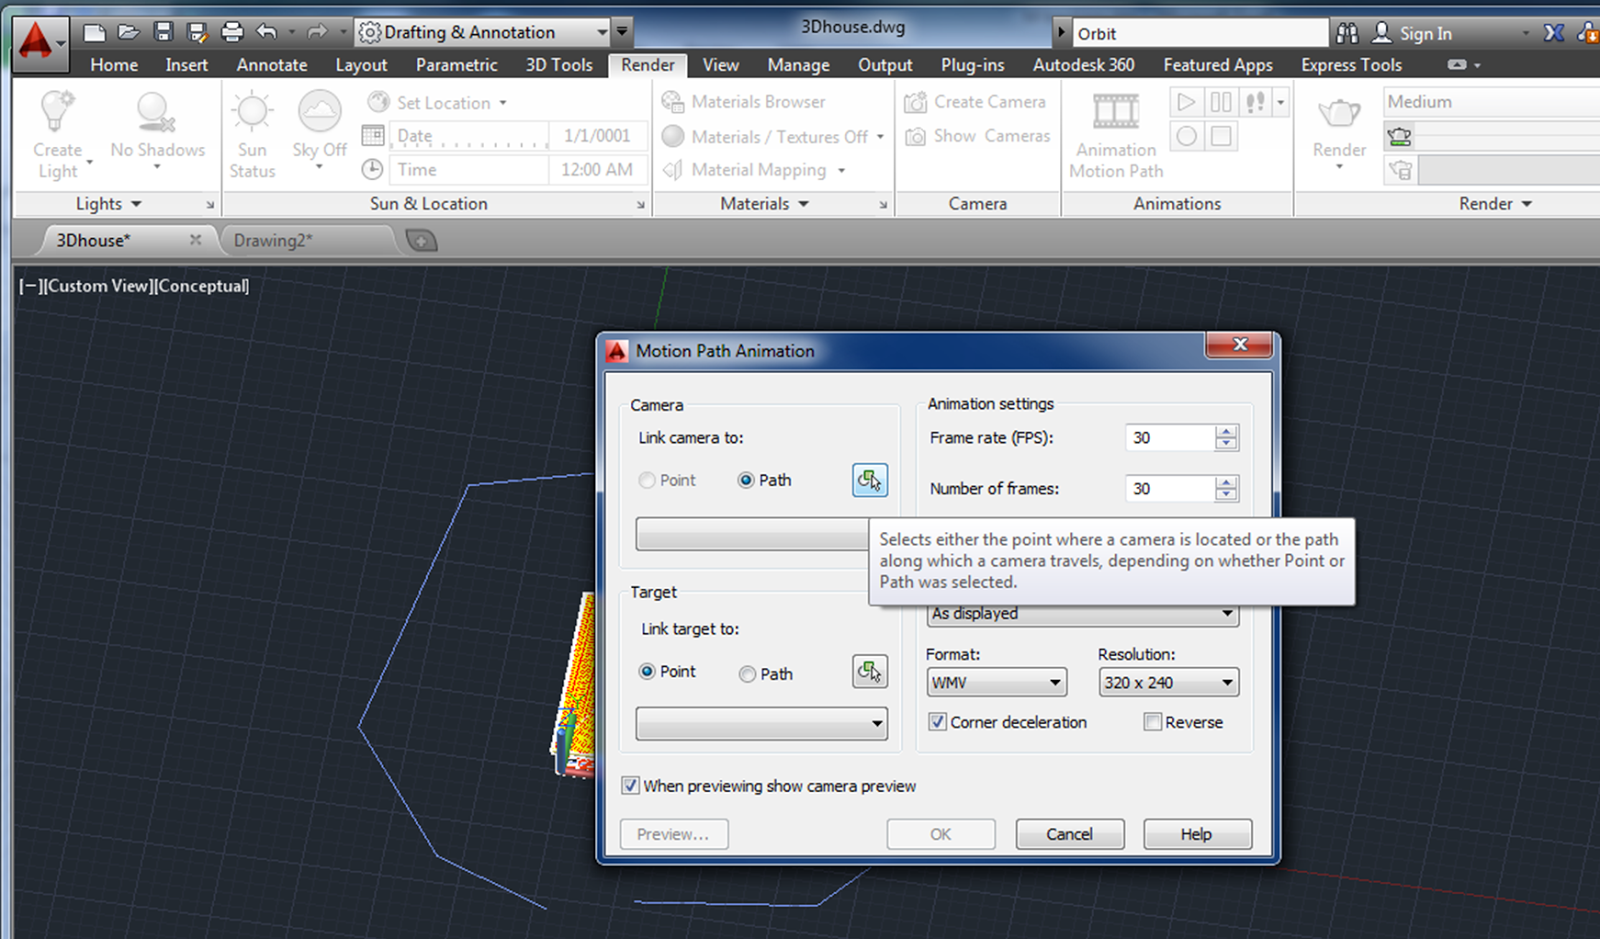
5. Keep previewing and playing around with it until you get a good sweep.
Example youtube explaining it:
http://www.youtube.com/watch?v=xmE7UEiE1Nc
Remember Perspectives?
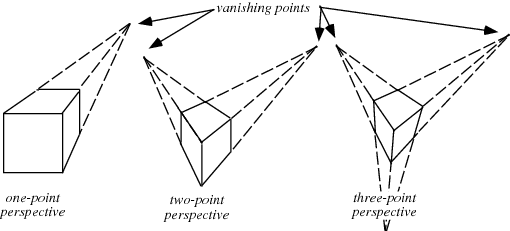
1. Single Point Perspective - use for interior views.Keep the target and the camera at the same height and the line of sight either horizontal or vertical.
Type ORBIT (or 3DORBIT)
right click
Hold down the shift + left mouse button, then use the scroll, and see if you can do a "walk through" of your house.
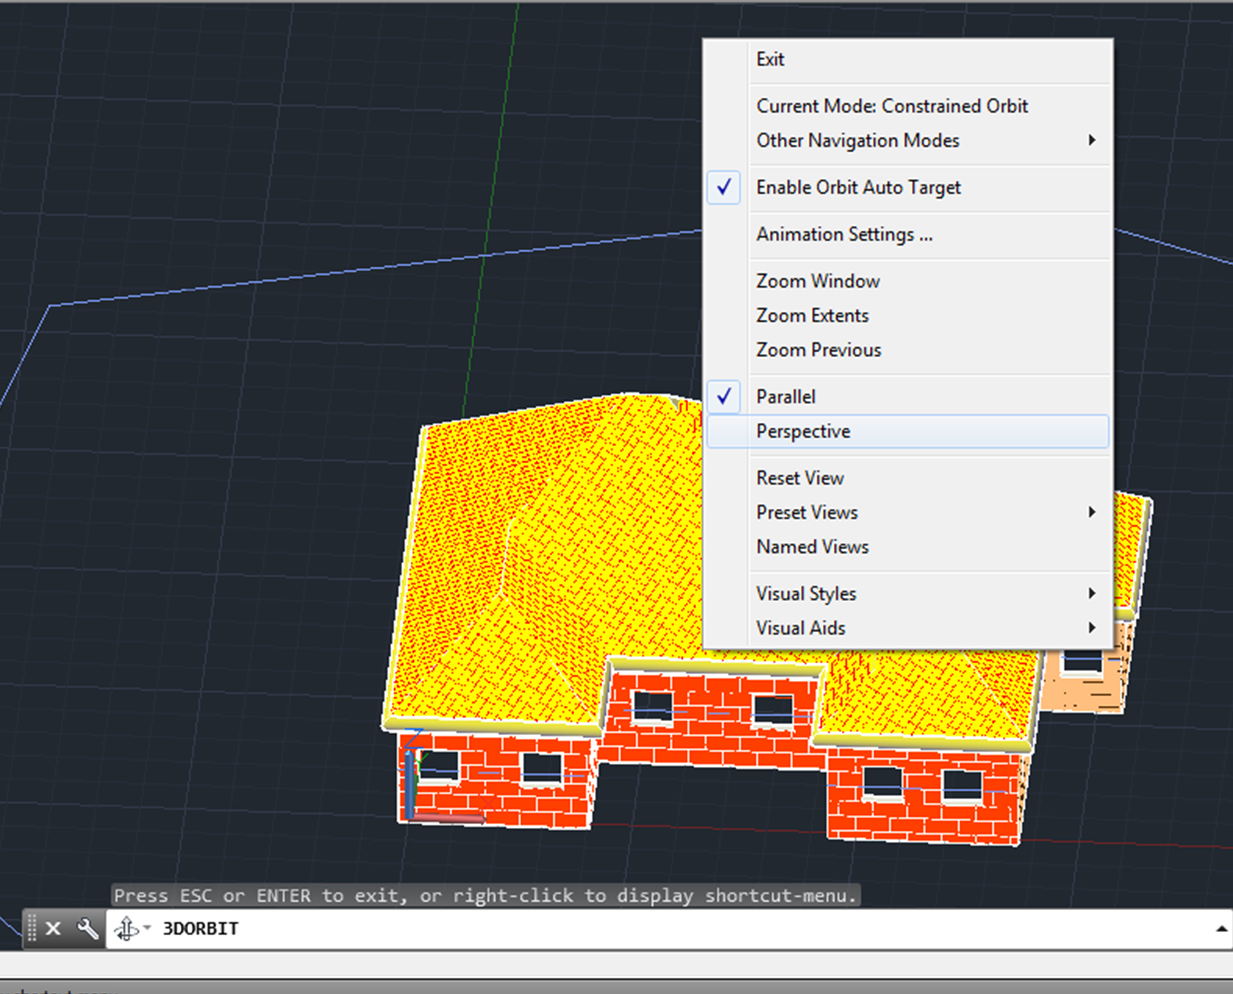
Look up "ORBIT" in the AutoCAD help menu, or on youtube, for more info.
No comments:
Post a Comment